Attended Mode Check-In
Training for staff or volunteers to use the Check-In Kiosks to assist congregants in the check-in process.
Turn on Check-In Kiosks
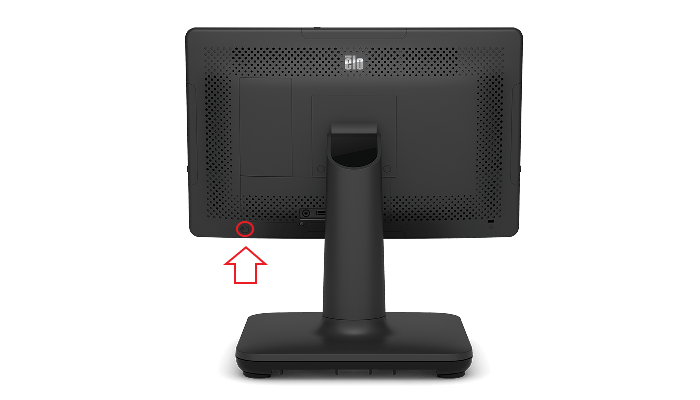
Step 1: Turn on the Elo Touchscreen Monitor
To turn on the Check-In Kiosk, press and hold the power button located on the lower back right side of the monitor, until you here a beeping sound and the screen powers on.
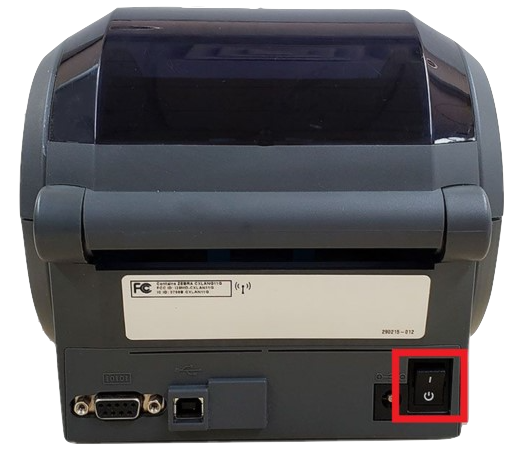
Step 2: Turn on the Zebra Label Printer
To turn on the Zebra Label Printer, make sure the power switch located on the back left of the printer is swtiched from the " O " (off) position to the " | " (on) position. A Green light should illuminate on the top of the printer when turned on.
Log into Attended Mode
Check-In Kiosks are configured differently for 2 different types of locations at Perimeter Church:
-
Designated "Start Here" Counters These Kiosks are Rear-Facing and configured for staff or trained volunteers to use to assist congregants in the check-in process.
-
Self-Service Check-In Kiosks These Kiosks are Forward-Facing and configured for congregants to use as a self-service device to check-in themselves or their family into an event.
The Attended Mode login procedure is different depending on the location and orientation of the Check-In Kiosk.
At the Designated "Start Here" Counters
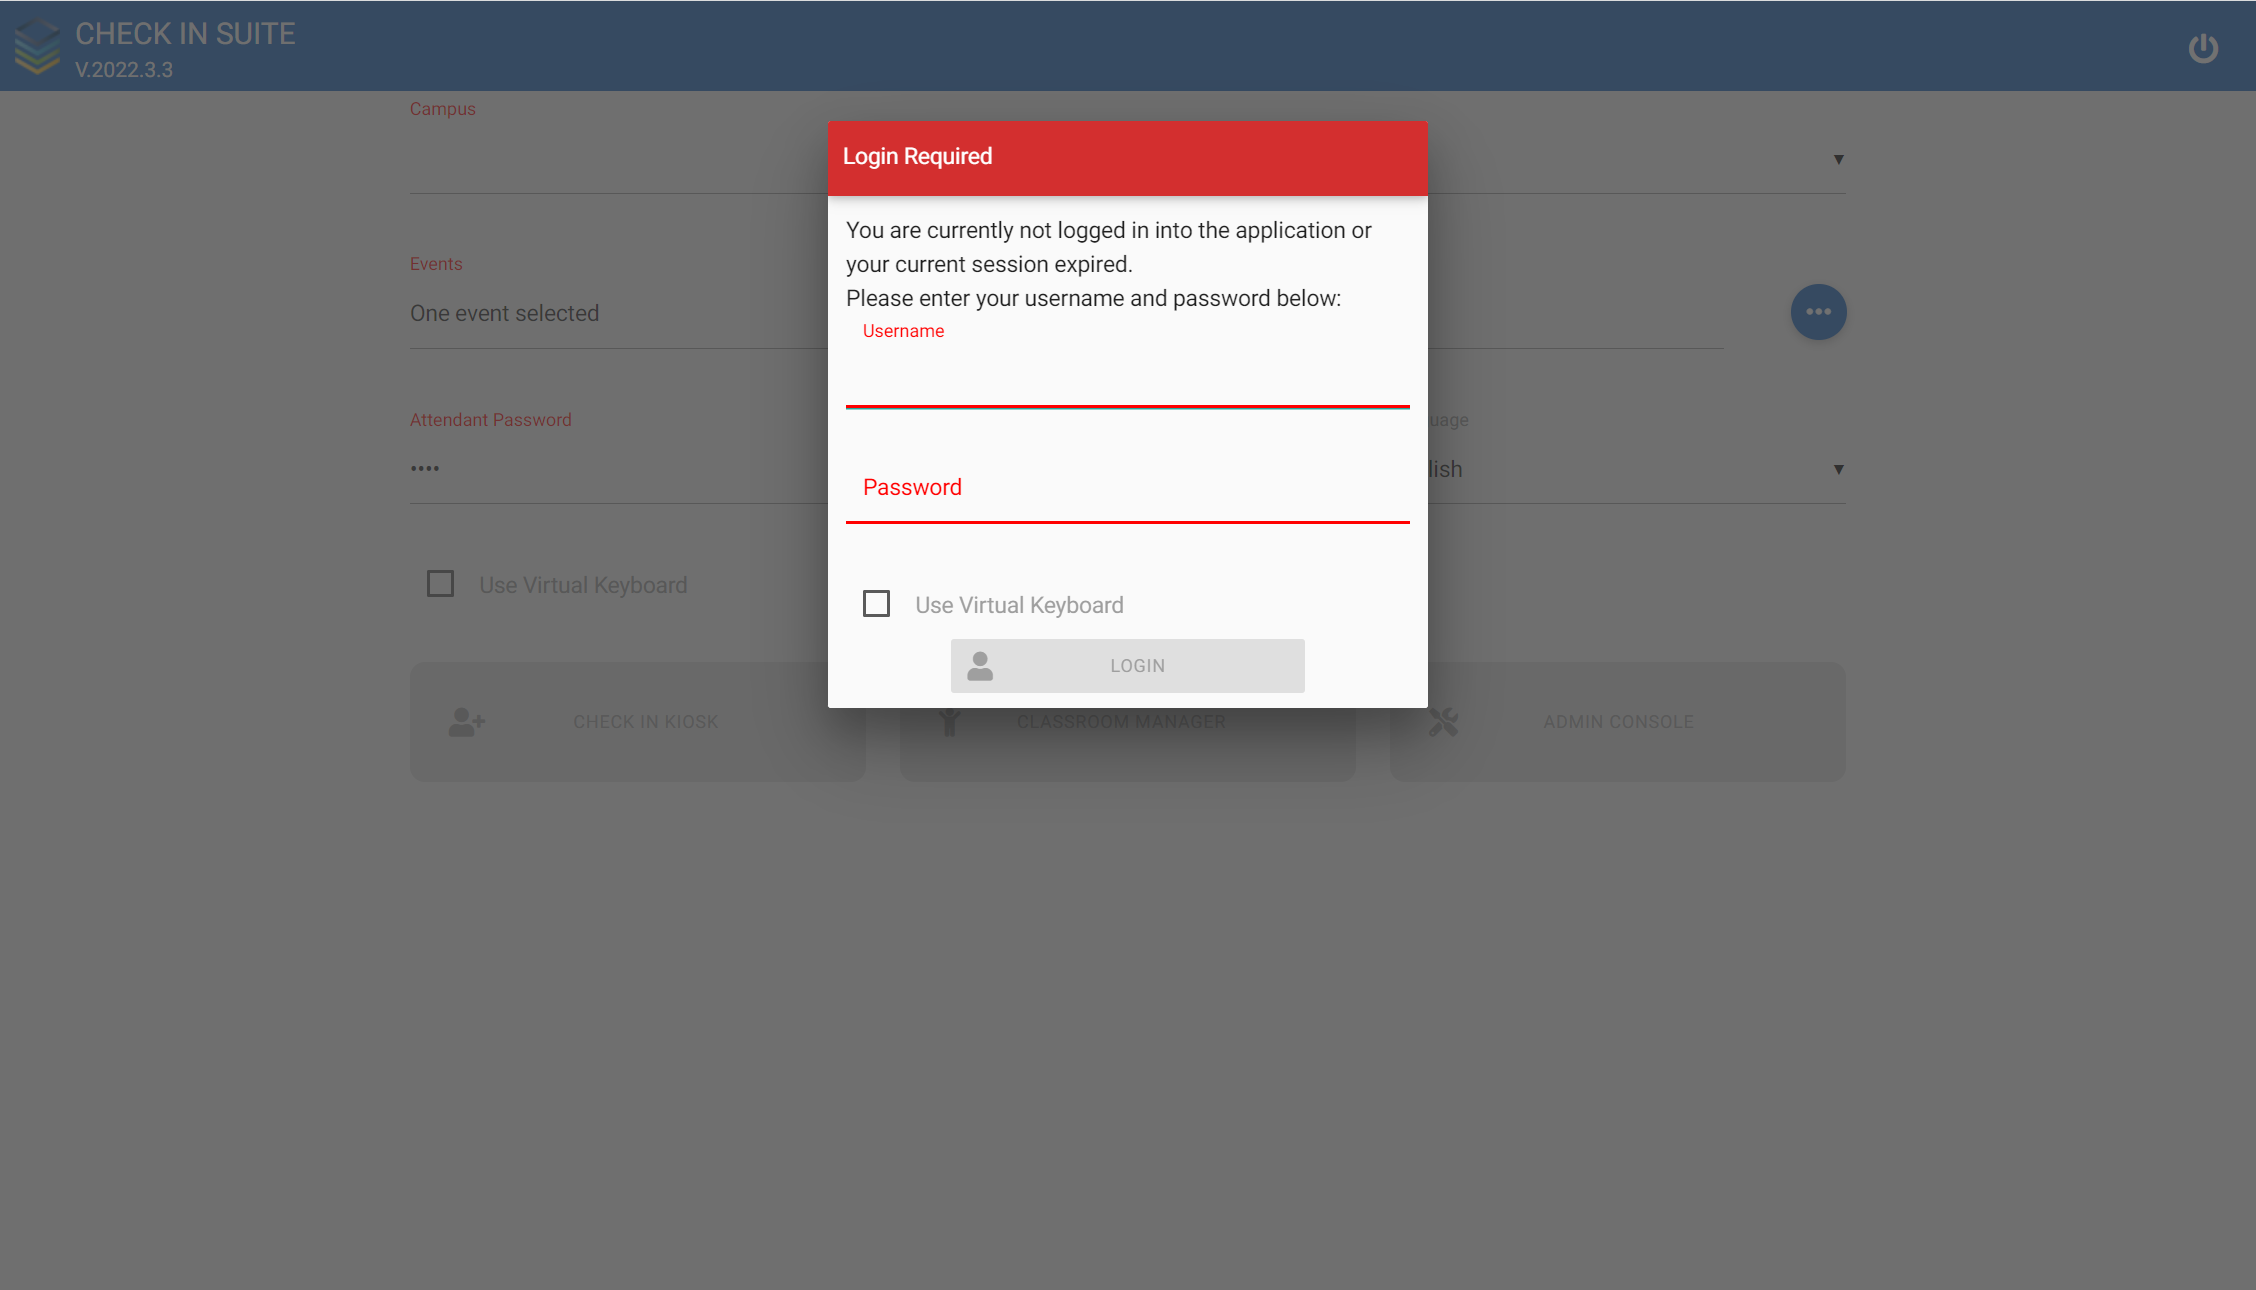
After Turning on the Check-in Kiosk, the kiosk should open up to a log-in screen that looks like this:
Access Attended Mode
Step 1: Log into Account
To access the Attended Mode Check-In Account please enter these credentials:
- Username:
MannedCheckin - Password:
Balloon1!
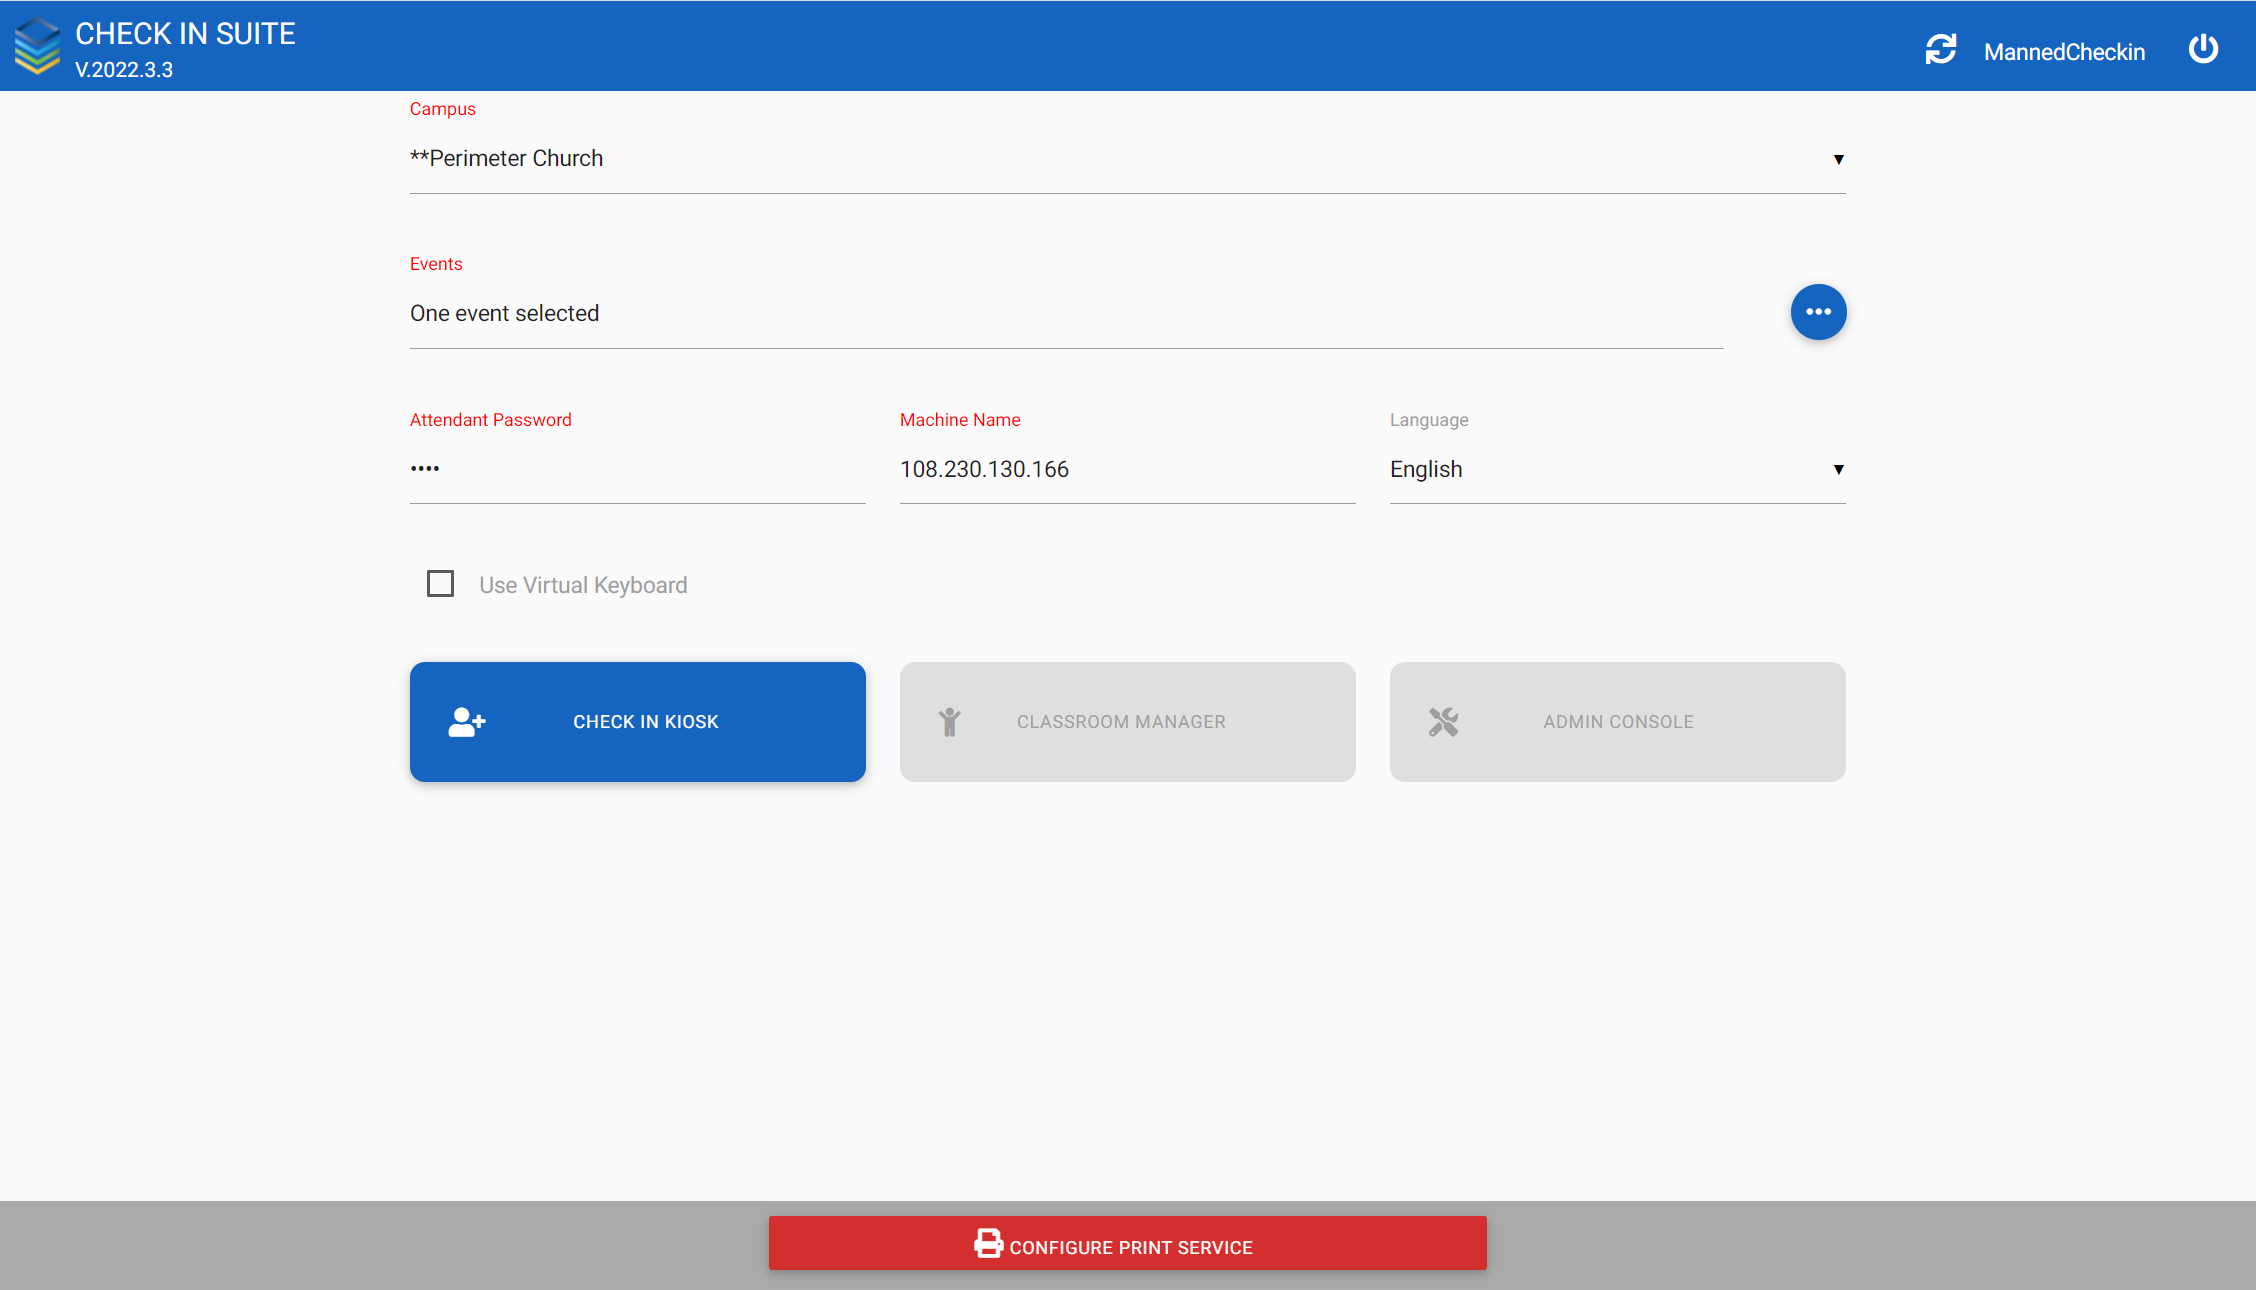
After entering these credentials you should see this screen:
Step 2: Populate Required Fields
- Campus: Always use **Perimeter Church
- Events: On Sundays when there are lots of check-in events happening the best practice is to select the ministries these events are associated with. This can be done by selecting the radio button next to "All Events in Ministries". If you are working at a children's ministry Start Here counter select KidsRock, KidsThrive, and KidsQuest. For all other events select the ministry that your event is a part of.
- Attended Password: This should be prepopluated, but if it isn't enter 1234.
Step 3: Click Check In
After clicking the Check In Kiosk button you should see this screen:
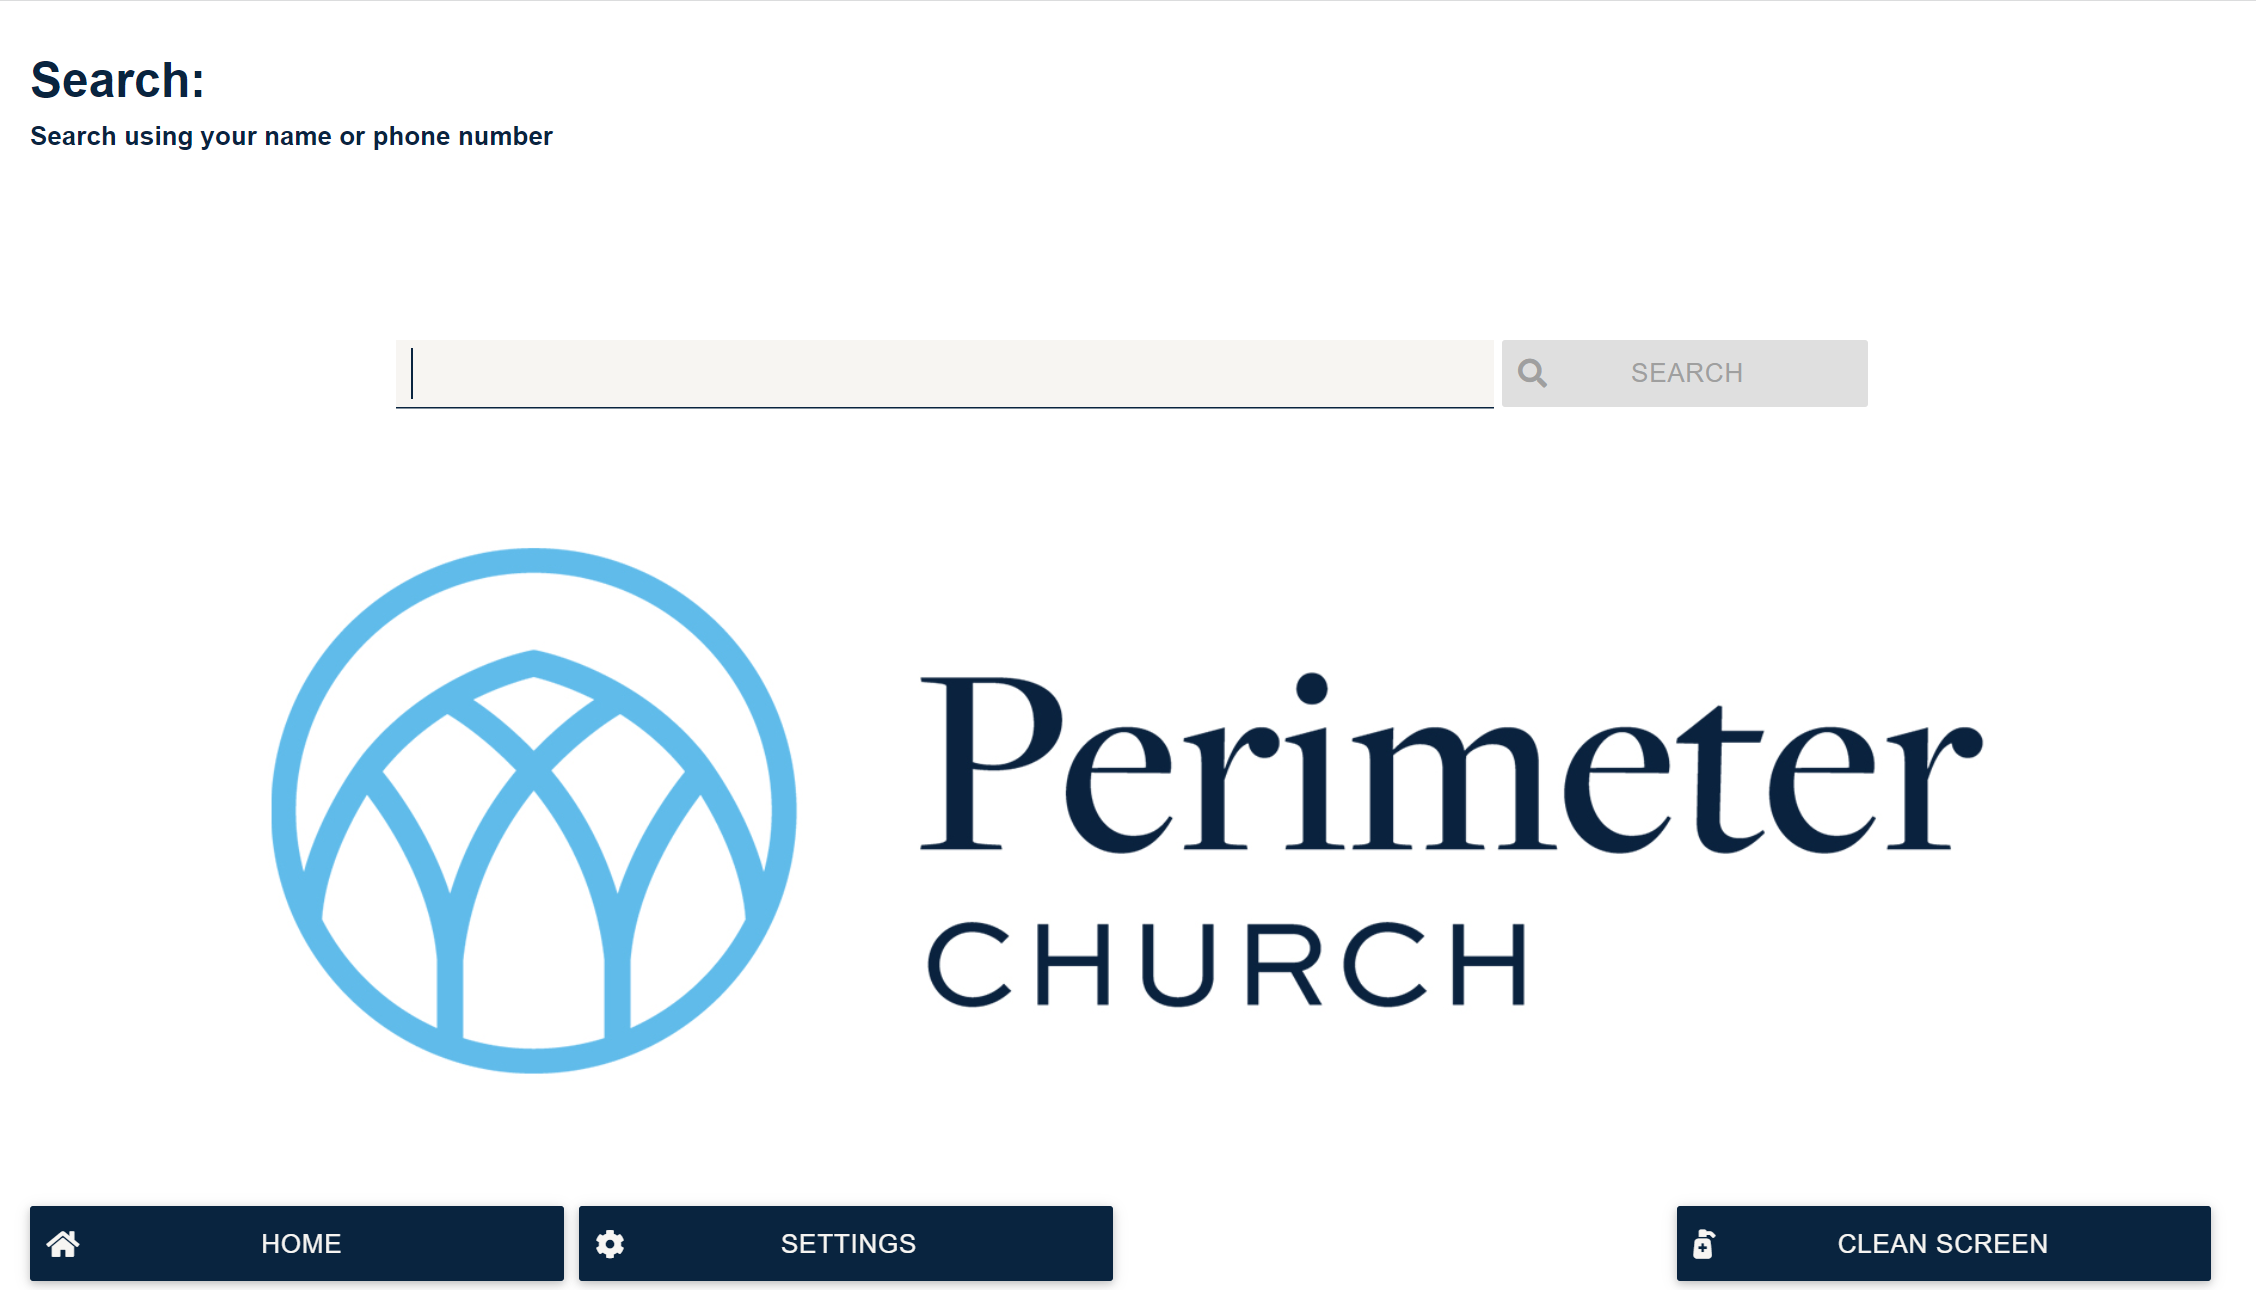
You will know that you are in Attended Mode when you see the "Home" and "Settings" buttons at the bottom of the screen.
The Check-In Kiosk is now logged in and setup for Attended Mode check-in.
Assist Congregant
Start the process by asking the congregant to enter their phone number on the numpad followed by the Enter button.
This has 2 possible outcomes:
Option: Edit an Existing Family
There are times that a family will already be in Ministry Platform and simply needs to be updated.
Step 1: Edit Family Button
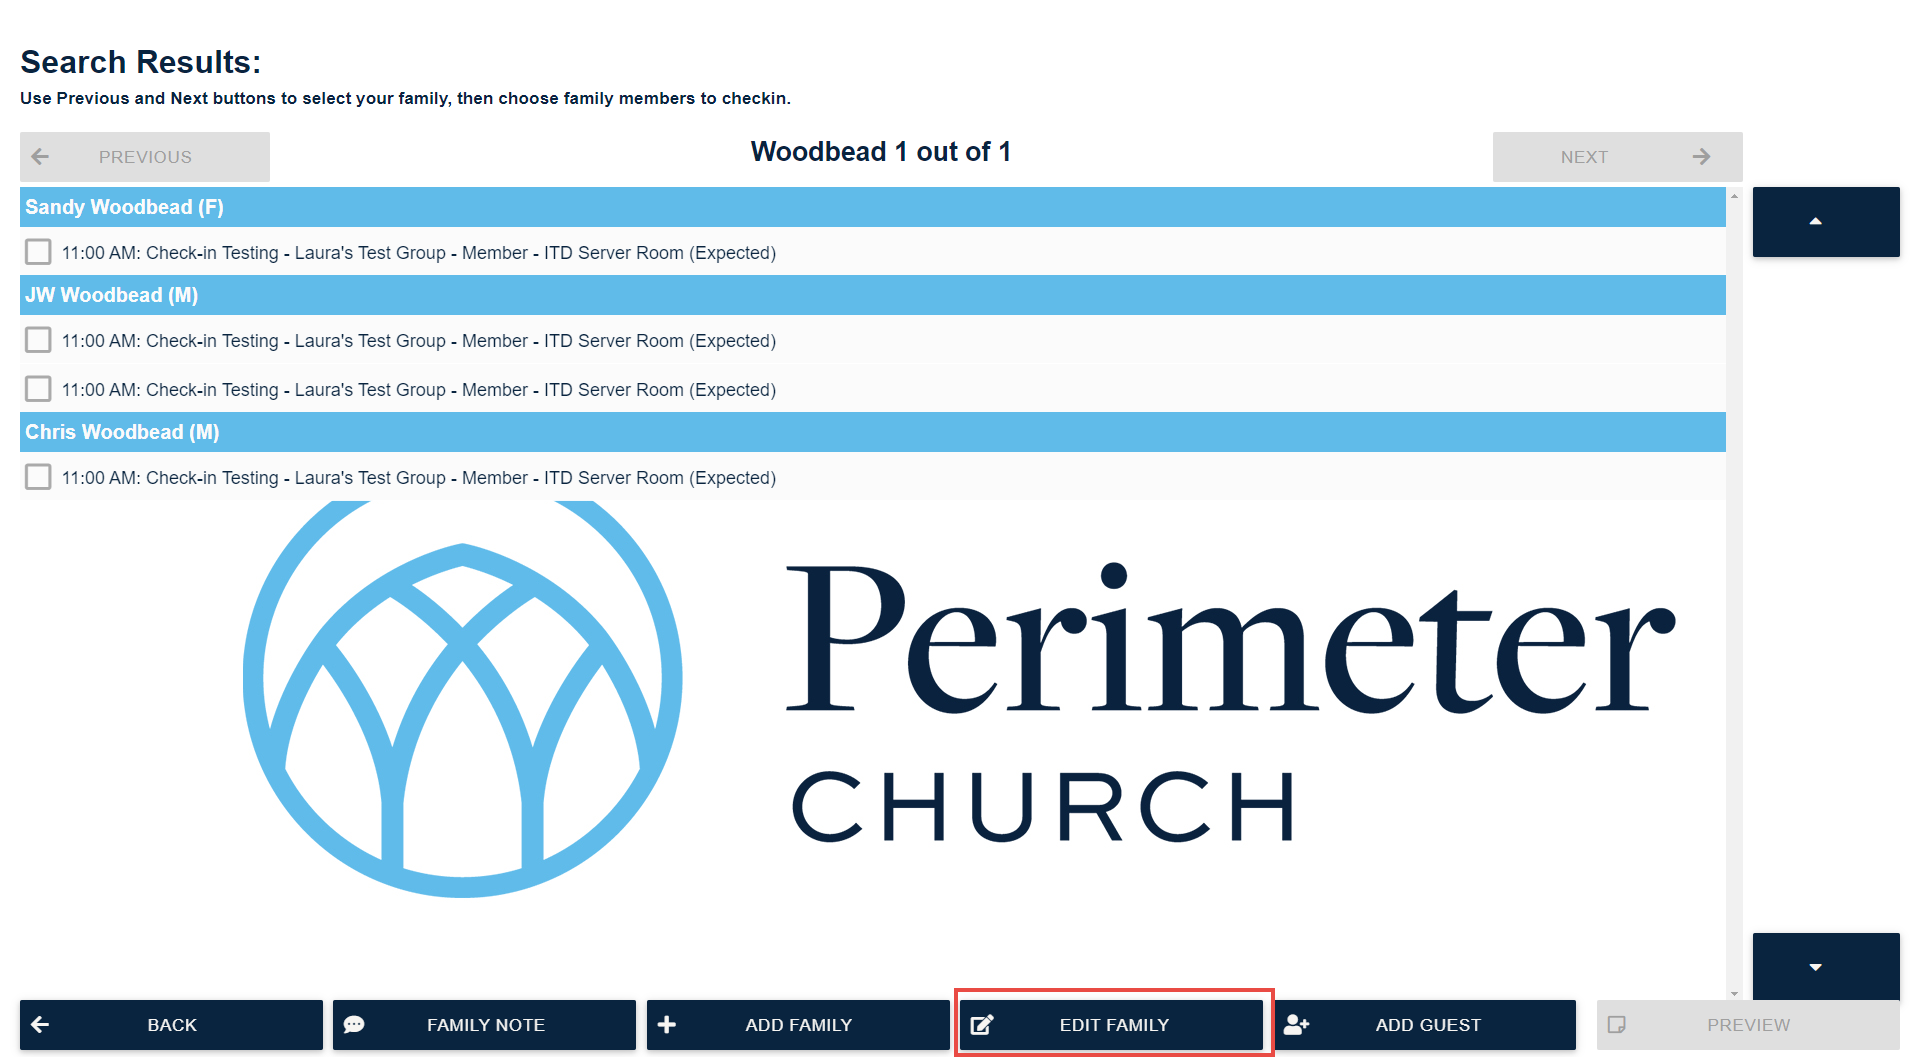
If a family is already in Ministry Platform they will show up on the screen after searching their phone number. At the bottom of this screen you will see an edit family button at the bottom of the screen. Click this button to move on to the next step.
Step 2: Family Details
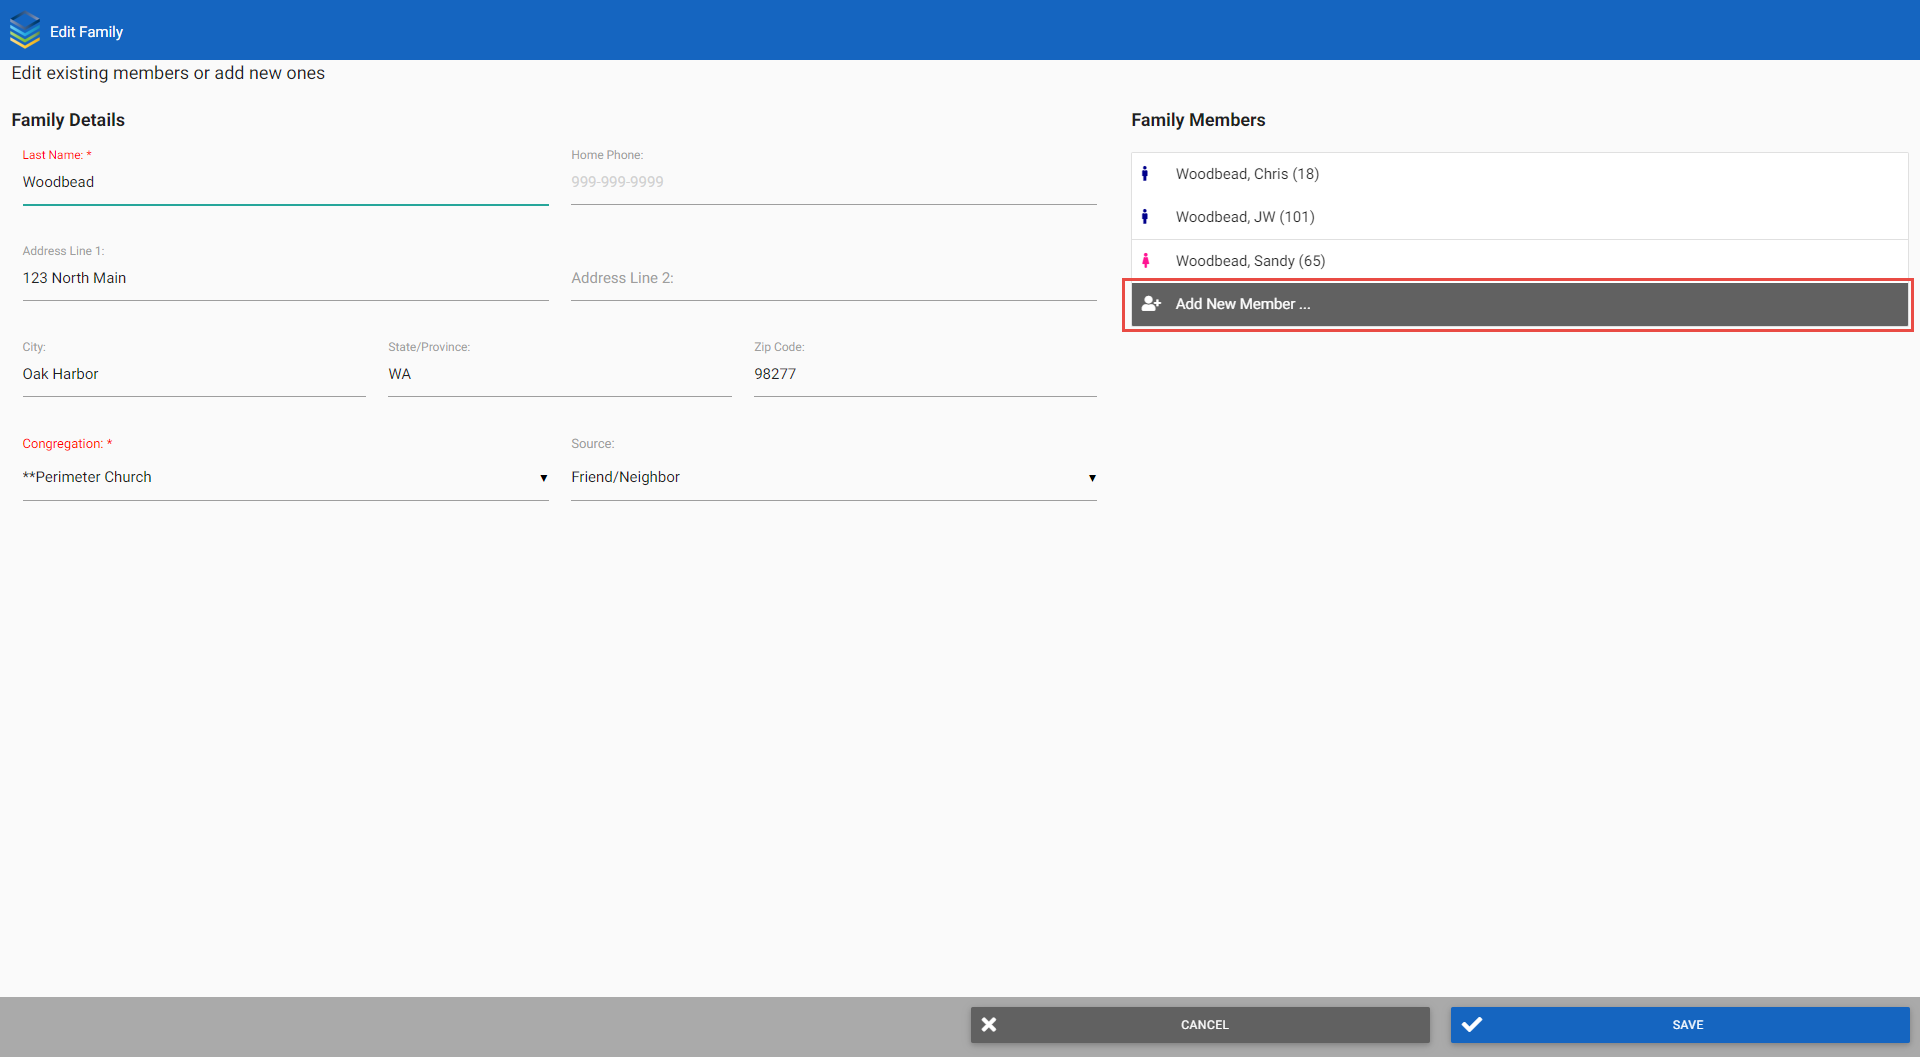
On the next screen you will see some basic family information. The required fields of "Last Name" and "Congregation" should already be populated. On the right hand side of the screen you should see a list of family members.
Step 3: Check Contact Info
Anytime we are caring for children we want to make sure we have a way to contact their parents. Select the parent on the right hand side and check that a current cell phone number is on thier record.
Step 4: Missing Family Member
To add a new family member use the "Add New Member" button.
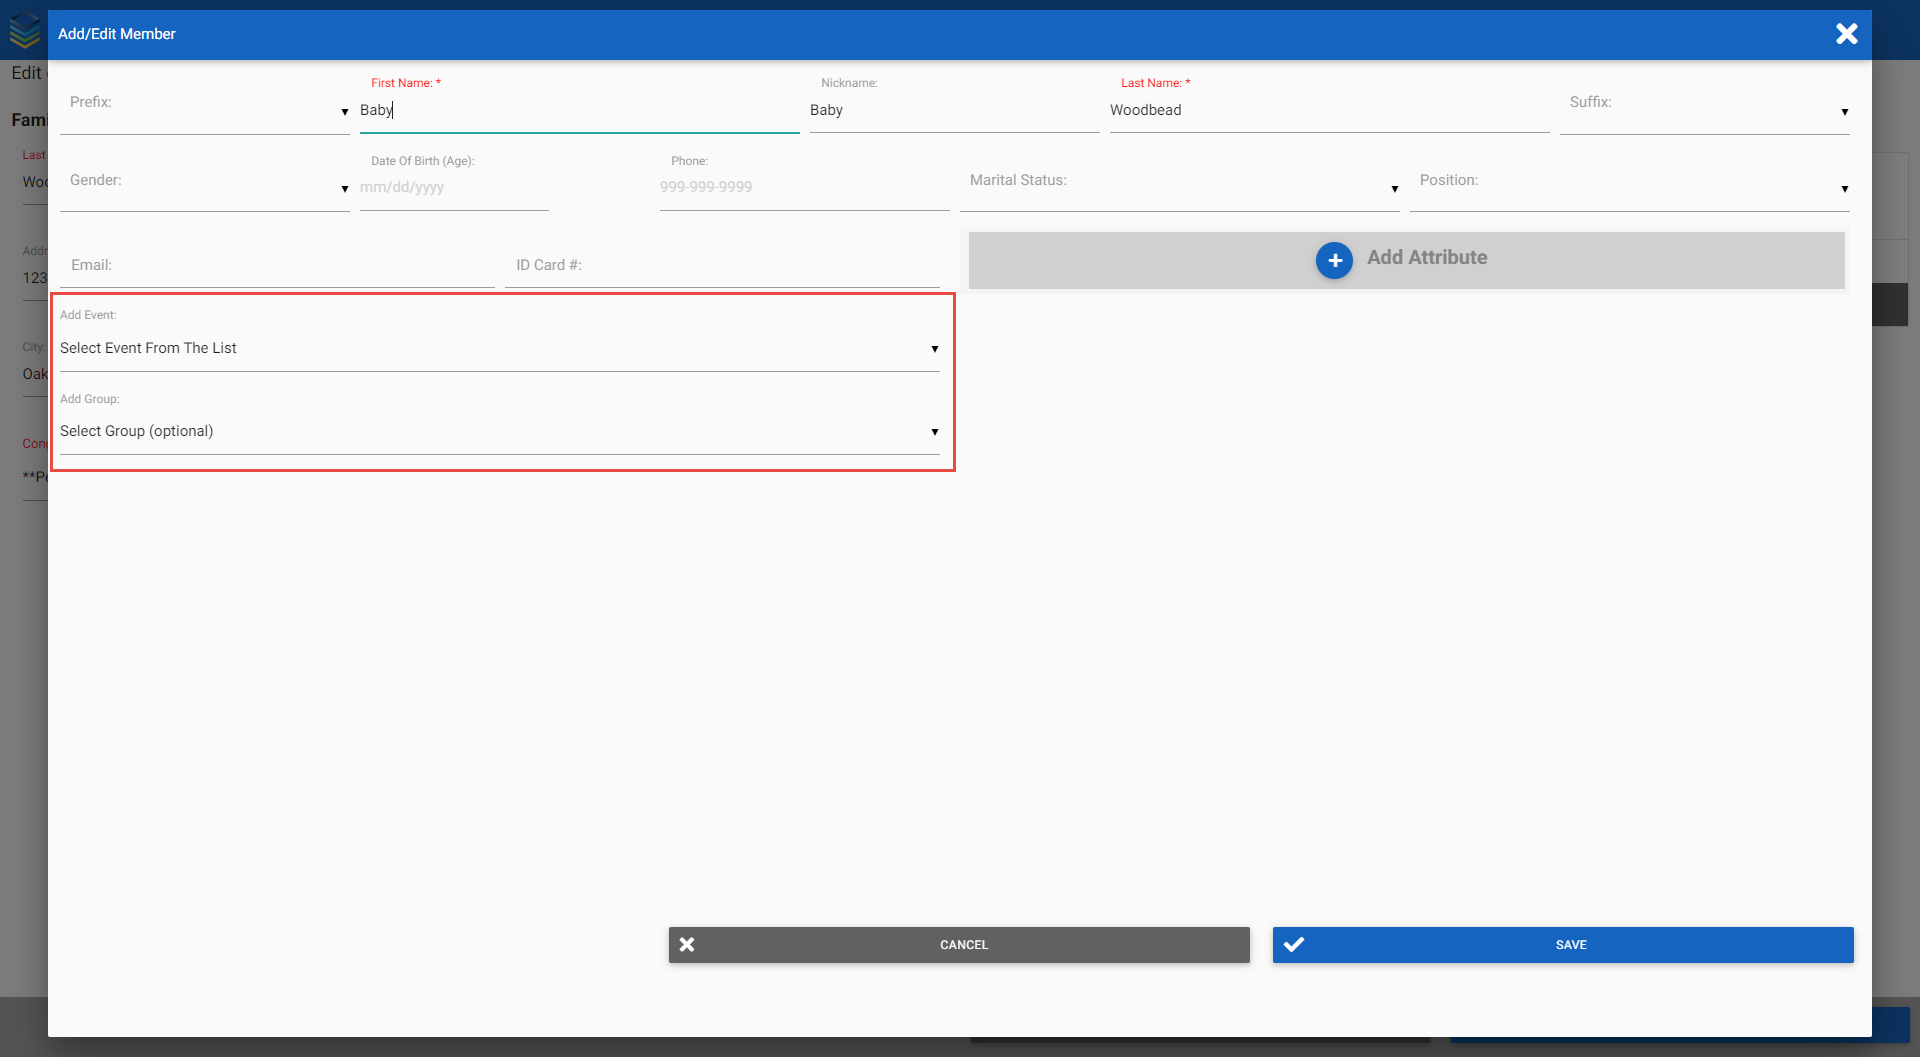
If this is a child please include date of birth, event. and group.
Step 5: Update Existing Child
- If a child is in the system but cannot checkin because they are not in a group you can ad them to the group.
- Click on the "Edit Family" button.
- Choose the child that needs to checkin from the list on the right hand side.
- Toward the bottom of the left hand side of this screen choose the event that the child needs to check into and add the correct group below that.
- Once you have saved these updates the child should be able to checkin.
Option: Add a New Family
There's a possibility that the family is already in Ministry Platform. This is why you should always search their phone number before adding a new record.
You can quickly add new people and families via Check-In Kiosk. This process automatically adds the information to MinistryPlatform and allows them to check into your event.
Step 1: Create New Family
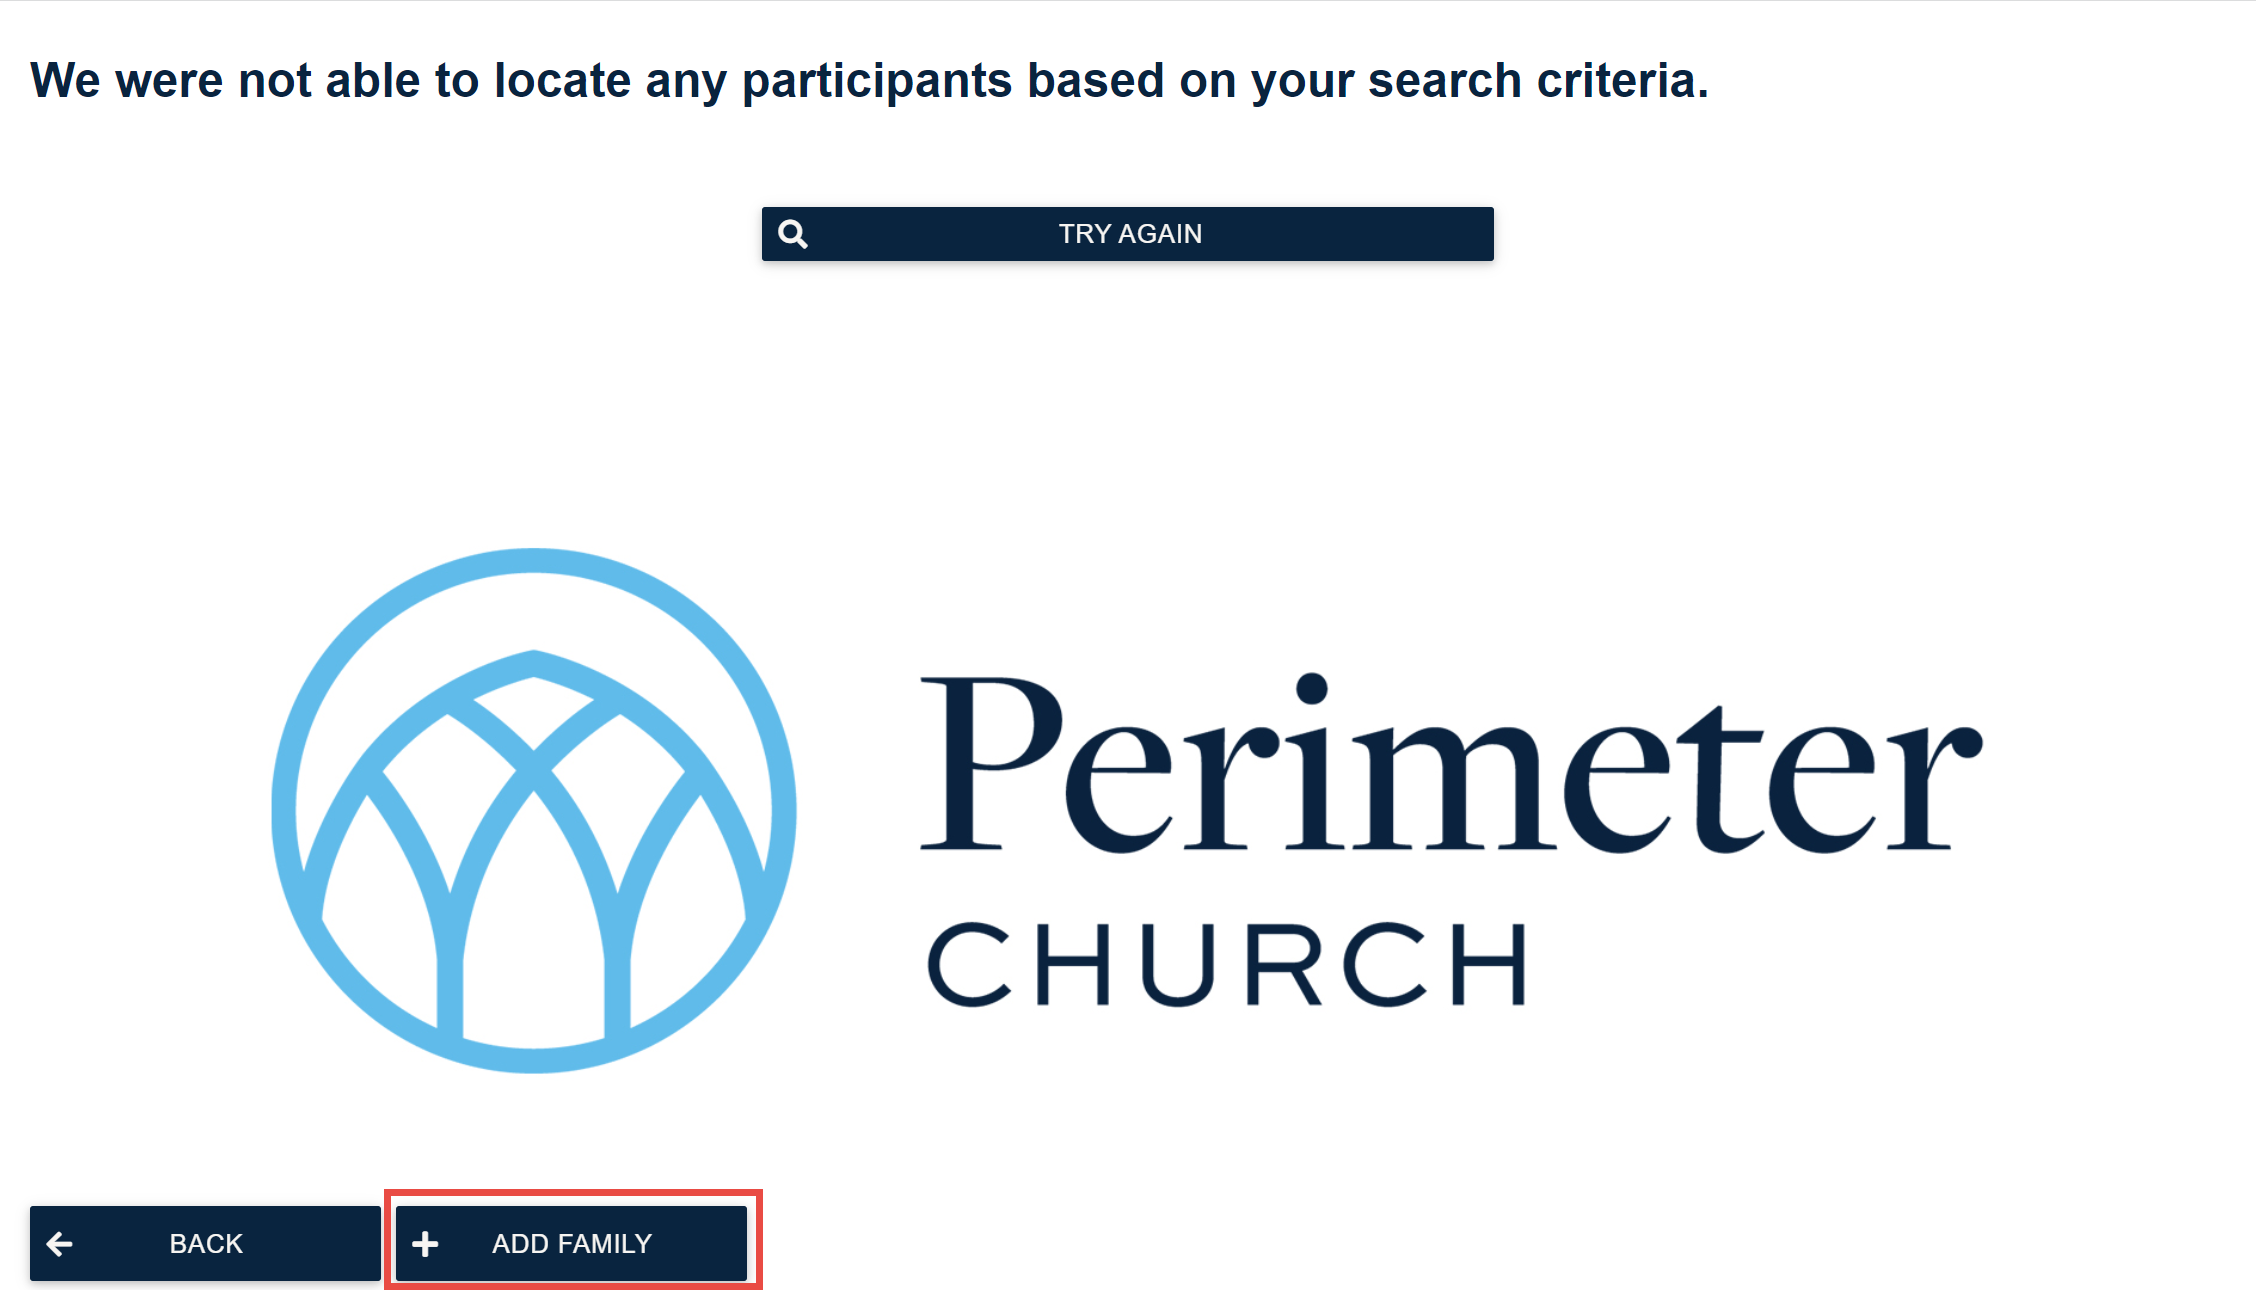
When you search a phone number that doesn't pull anyone up you will see "Try Again" in the middle of the screen. At the bottom of the screen there will be an "Add Family" button. Click that.
Step 2: Basic Family Info
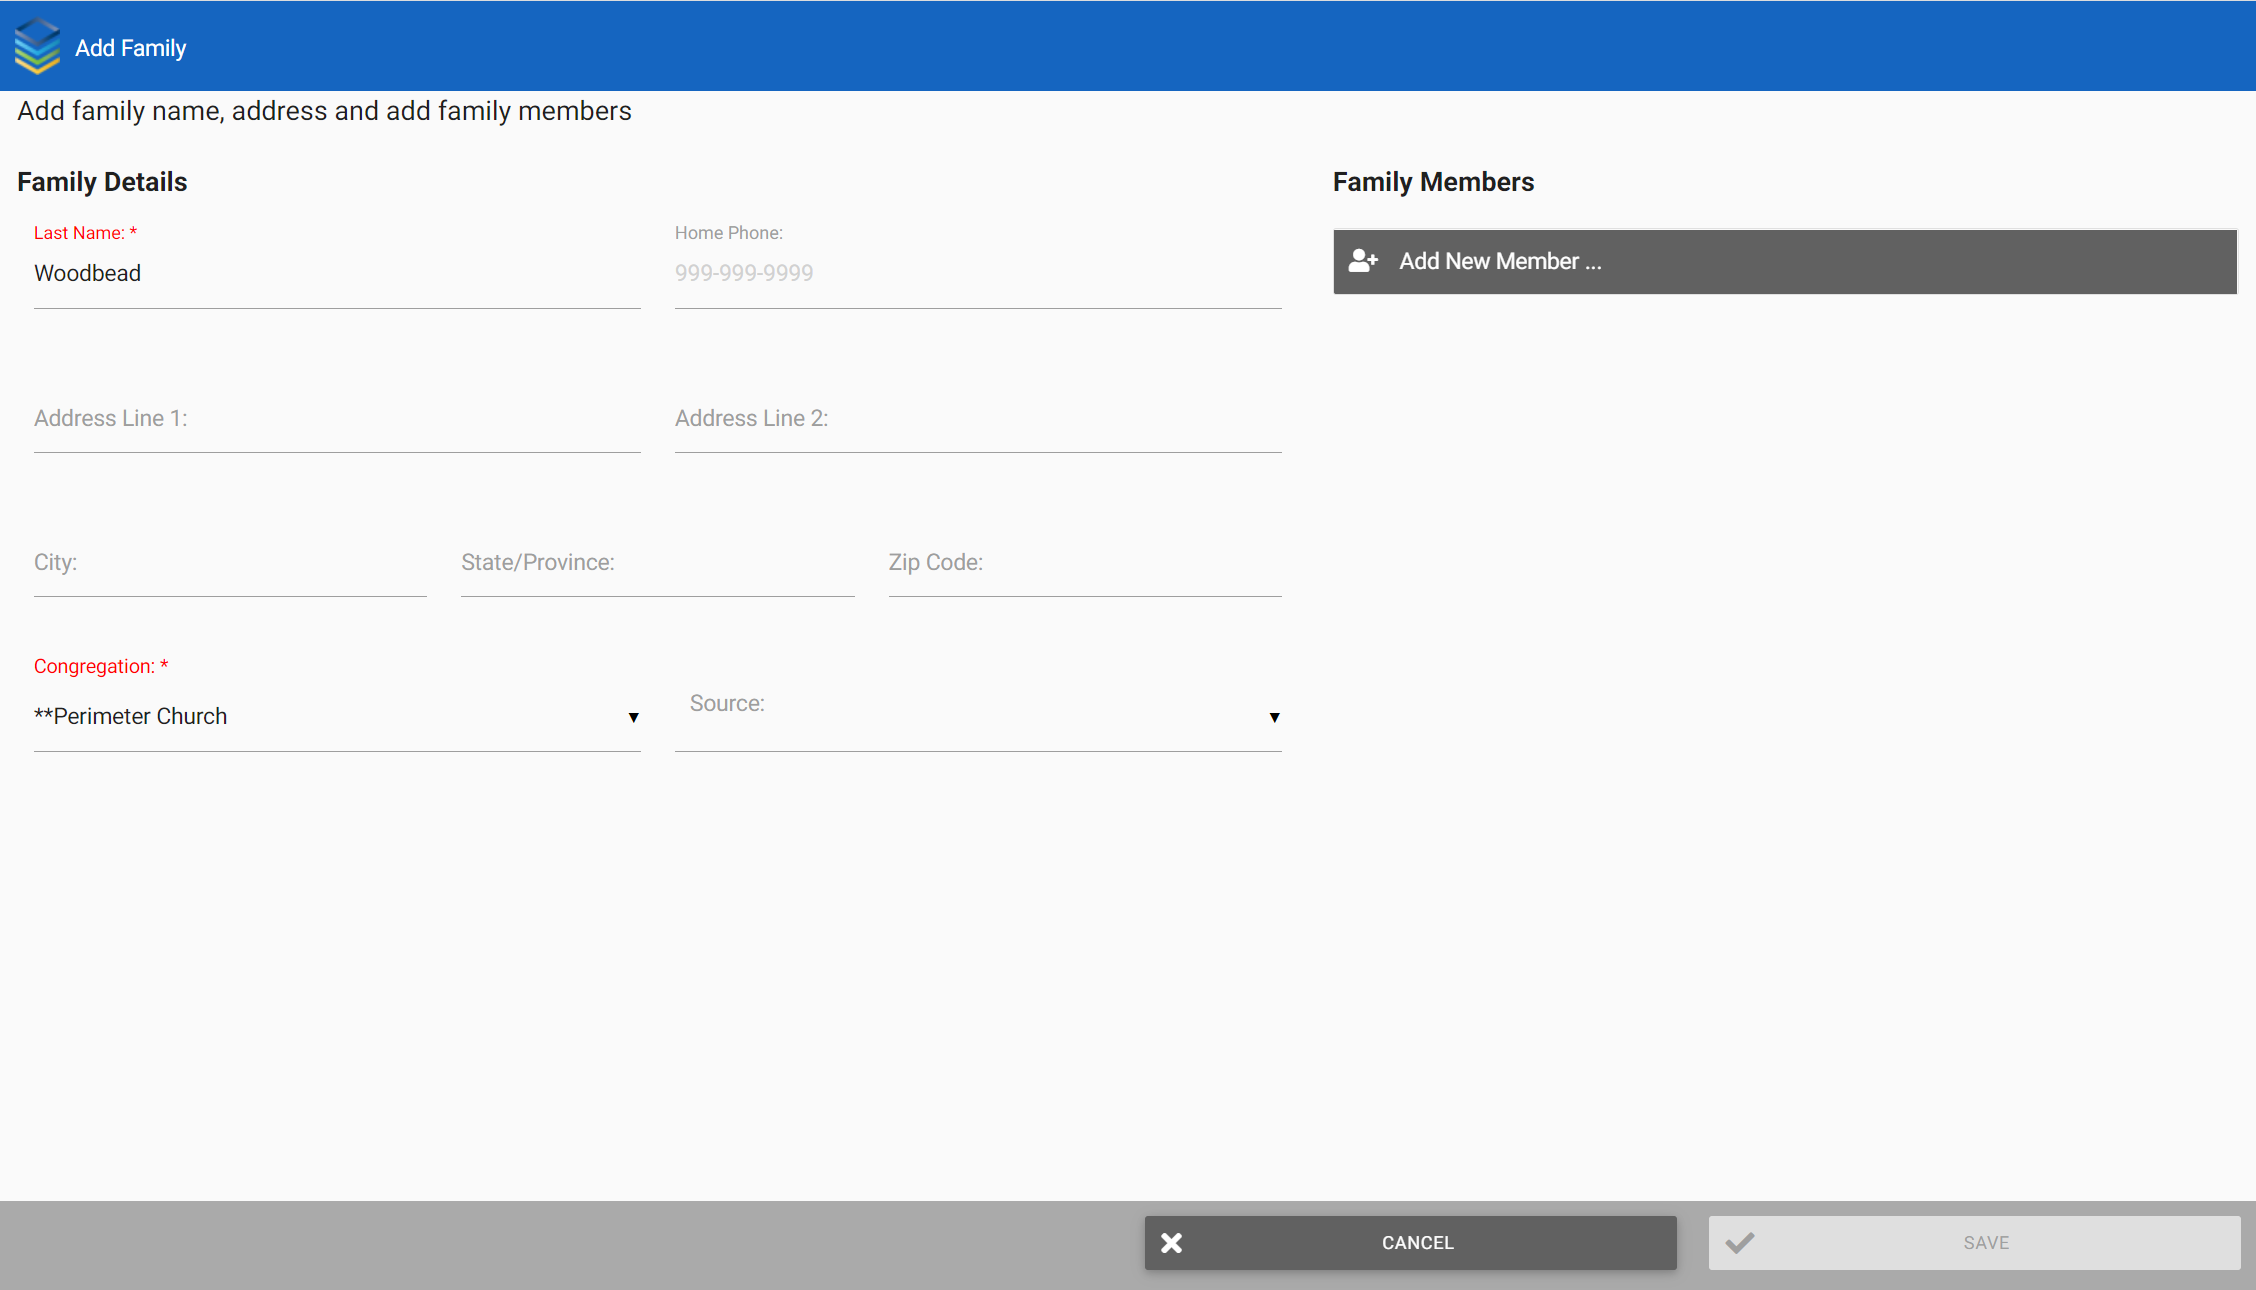
Add the basic family information; this fills in the Household record of MinistryPlatform. Required fields are indicated with an asterisk (*).
- For congrigation always use "**Perimeter Church"
Step 3: Add Individuals
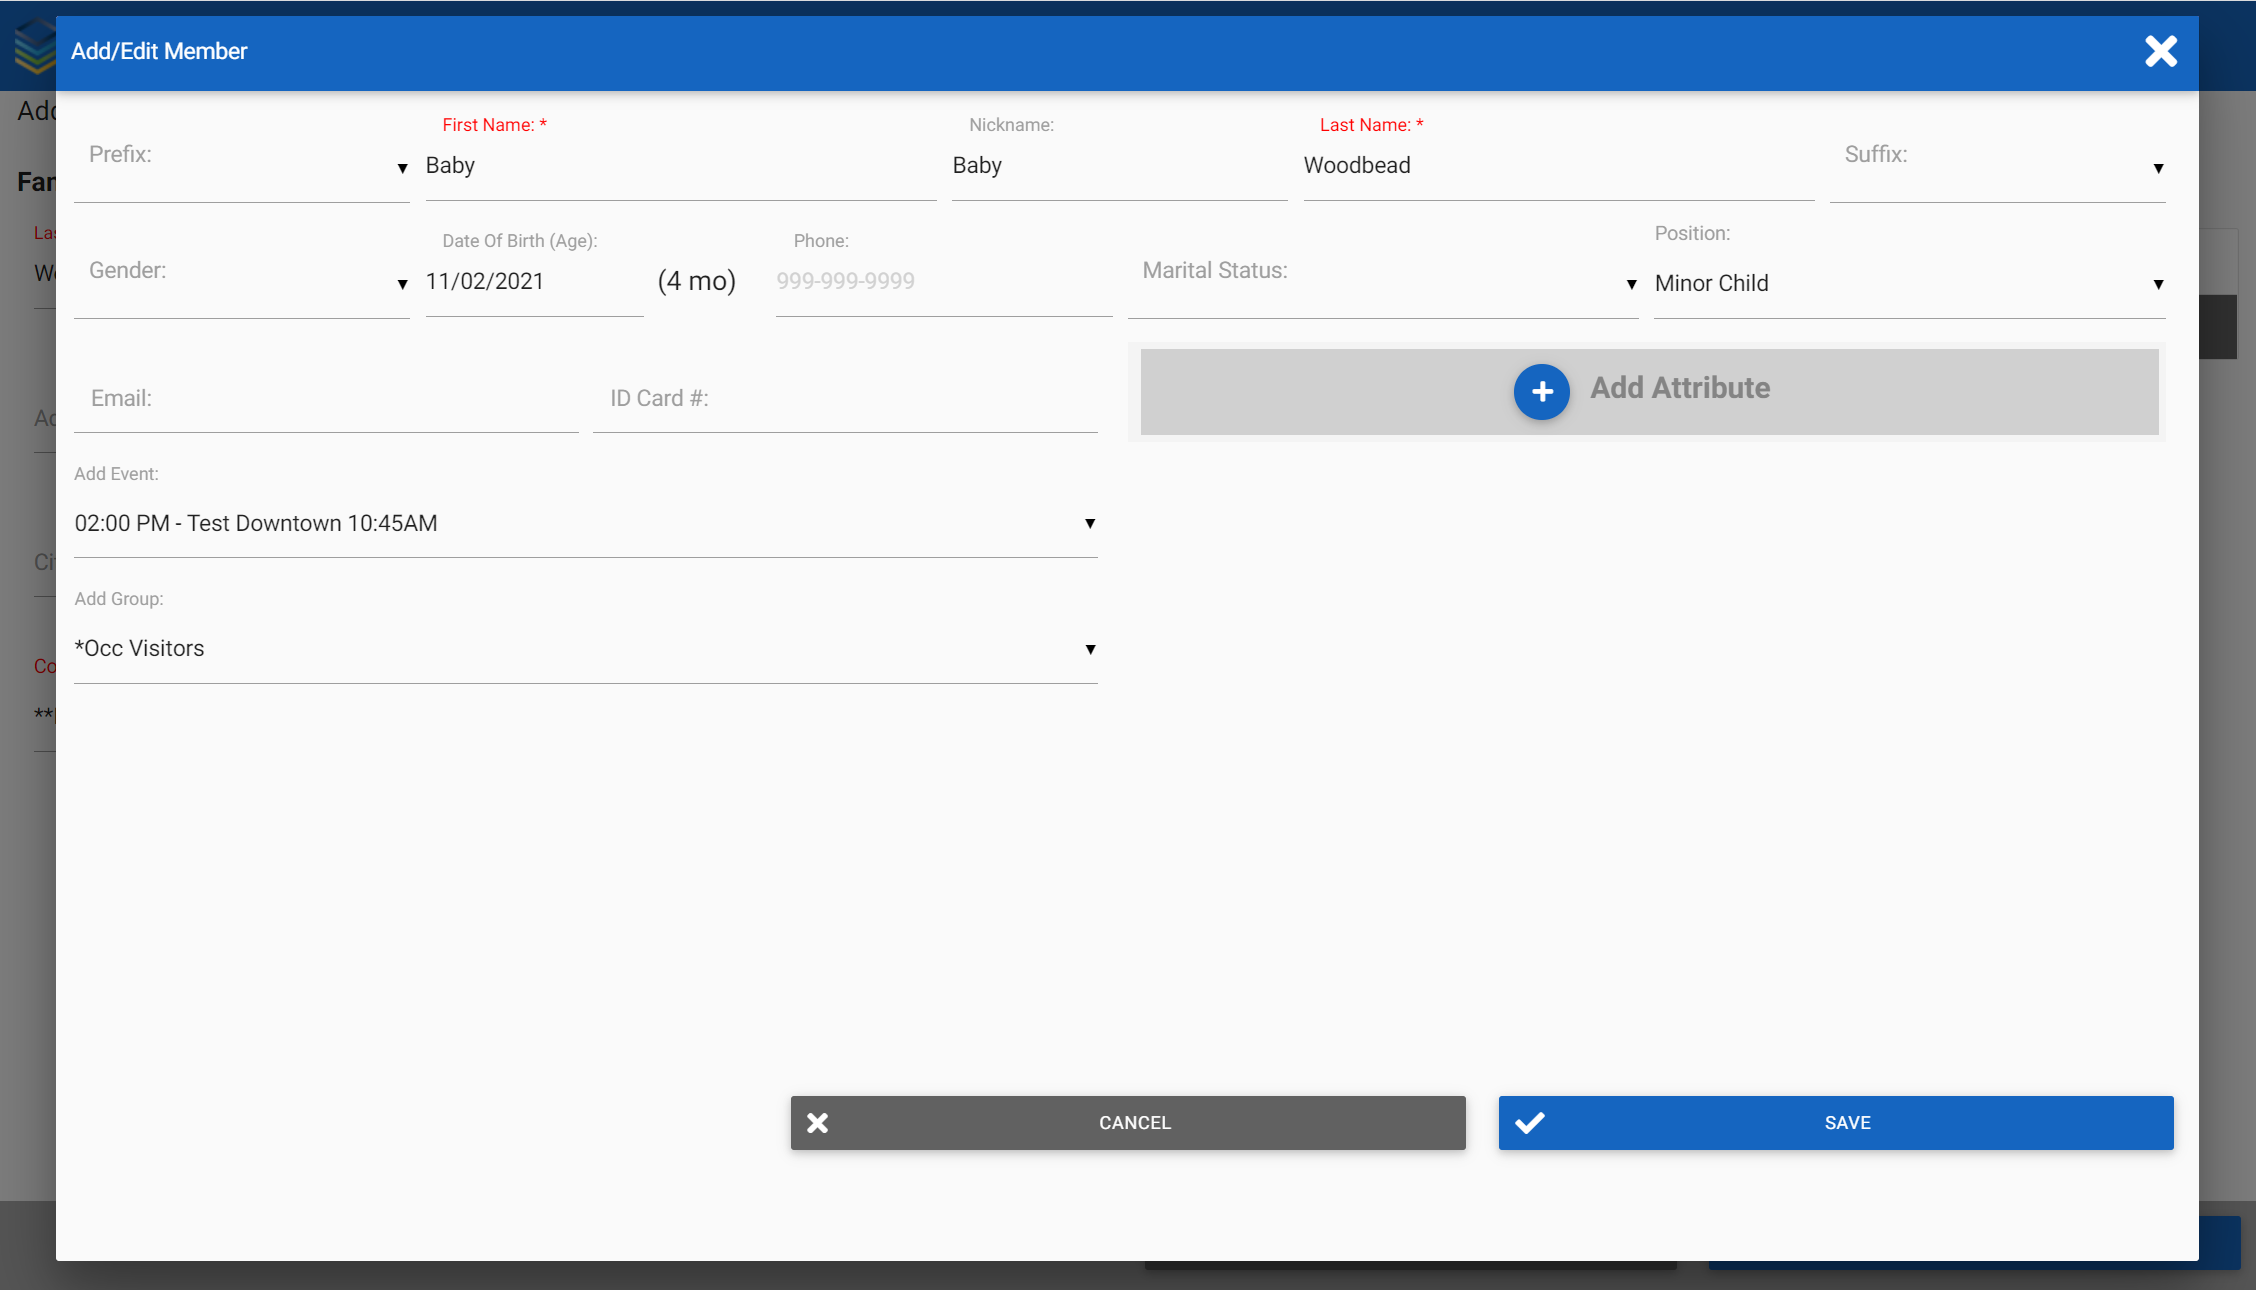
Click Add New Member and enter individual-specific information about one of the family members.
- For parents be sure to include household position (head of household) and phone number.
- For children be sure to include household position (minor child) and date of birth.
- Children will need to be associated with the correct evnet and group. Both KidsRock and KidsQuest have vistor groups that should appear at the top of each list. Use these groups to quickly add new children so they can complete checkin.
At Self-Service Check-In Kiosks
This is helpful for situations like:
Access Attended Mode
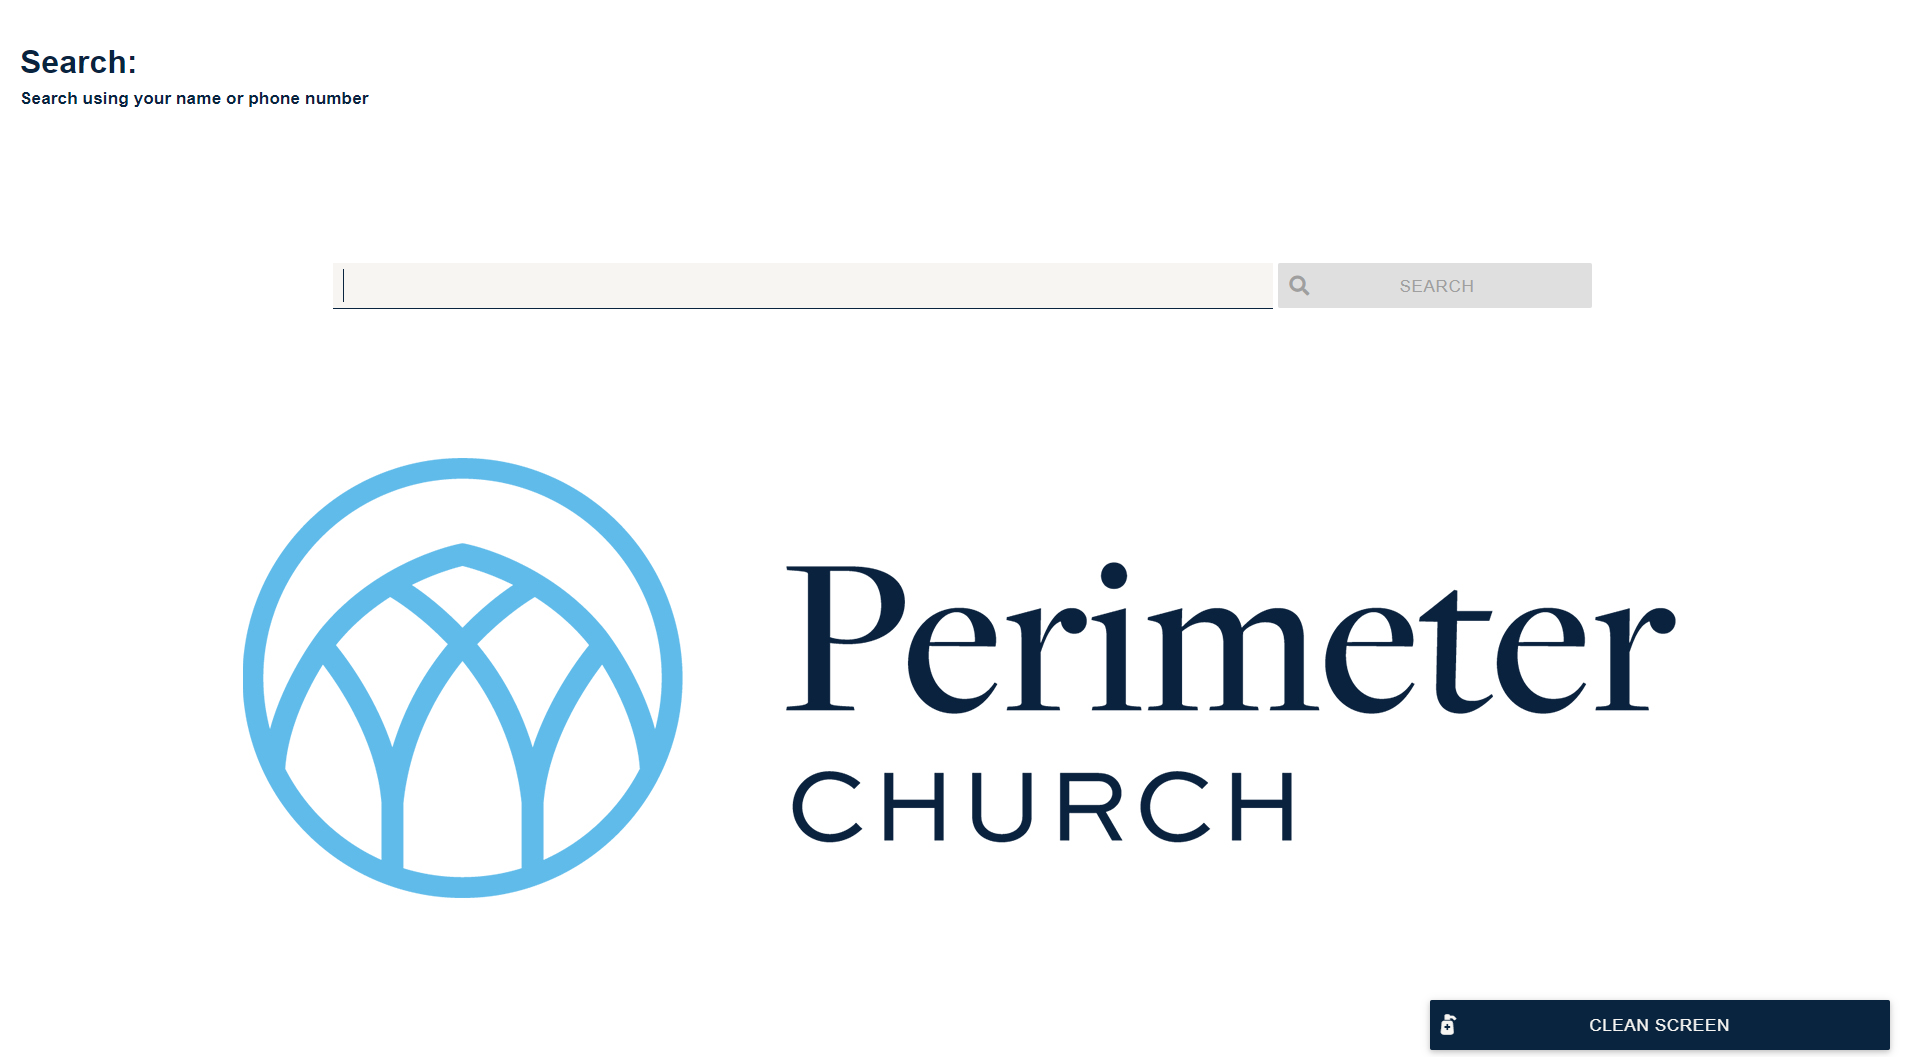
After Turning on the Check-in Kiosk, the kiosk should open up to the main check-in screen that looks like this:
Step 1: Temporary Login
From the main check-in screen press * on the numpad. It should bring up the "Requesting Attended Mode" Window.
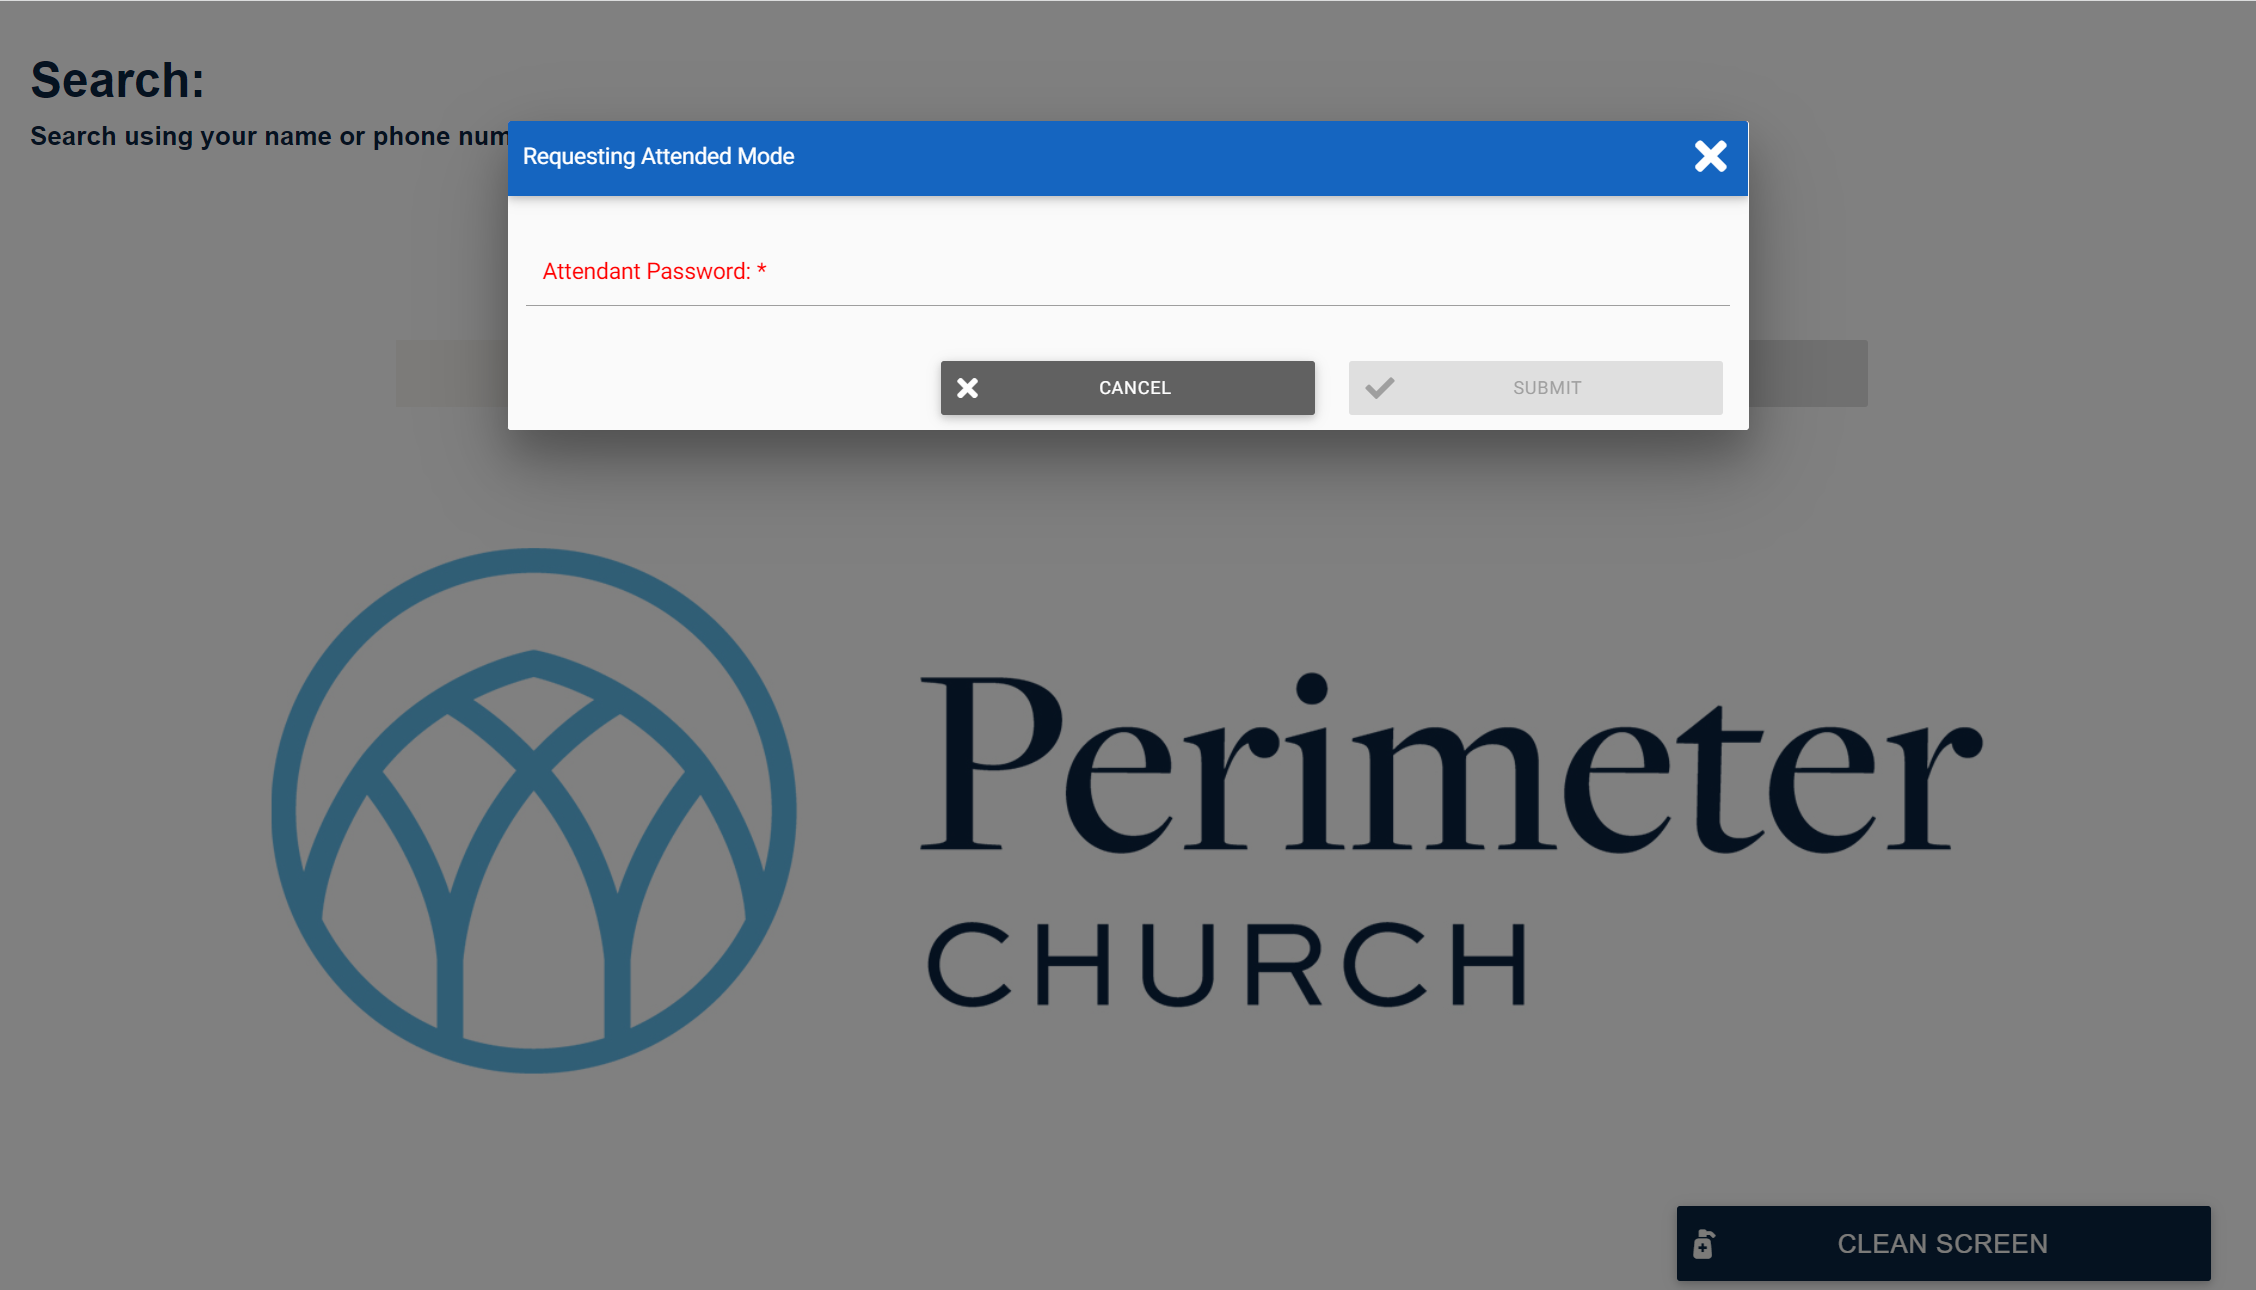
Step 2: Enter Password
You will be asked to input a password. Type in 1234. After this you will be able to use attended mode for one search session.

Reprint a Nametag
There will be times that a name tag needs to be reprinted. This can be done after accessing the attended mode. Times that you might need to do this are:
- tag is lost
- printer jams
- printer doesn't print as expected
Add Participant to Group
There are times that children are in Ministry Platform but have not been added to the correct group. They need to be placed into a group to complete the checkin process.
Step 1: Type Phone Number
Once you have entered attended mode, type the family's phone number again to pull up the correct family.
Step 2: Edit Family
Use the edit family button at the bottom of the screen to open up the editor.

Step 3: Select Child
On the right hand side of the screen select the child that needs to be added to the group. Once their record opens add the correct event and group to their record.

This can only be used for people who are already in Ministry Plaform. If the congregant is not showing up in checkin after going to attended mode please take them to a Start Here counter so that they can be added.
Adding a Guest Child
There are going to be possibly two different scenarios when checking in a guest child:
- the guest child is checking in with a child that is already in Ministry Platform
- the guest child is checking in without another child and checking in with someone that is not in their household
The first scenario might be a friend who spent the night with a child that is already in Ministry Platform and the second scenario might be parents/grandparents checking in a child that is not yet in Ministry Platform and is checking in alone.
Let's take a look at the process for each one.
Checking in a Guest Child With Another Child Already in Ministry Platform
Let's say you have a child that brought a friend that does not attend Perimeter and they need to be checked in. The friend of the child is not currently in Ministry Platform, but the child that attends regularly, who brought the guest, is currently in Ministry Platform. In this scenario you would check in the child that attends regularly and at the bottom you will see a button that says, "Add Guest".
When you tap on the button that says, "Add Guest" it will prompt you to fill out a few basic fields about the guest child. When finished, it will add the guest child in as a Guest Child in their own Household.
But there is one caveat to keep in mind: this mode can only be used when checking in a guest child with another child that is already in Ministry Platform. This cannot be used with a guest child that is checking in alone. The next section below will address that scenario.
Checking in a Guest Child Alone without Another Child
There will also be a scenario when parents/grandparents might be checking in a child that is not in Ministry Platform and is also not technically a part of their household. This might be grandparents or parents checking in another child on behalf of that child's family that was not able to be there.
In this scenario you would add the child to the household of the adults checking them in, but make sure you mark the child as a "Guest Child" and not a "Minor Child".
This does not move that child into their own household, but it does mark them as a "Guest Child" instead of "Minor Child" which makes it easy for us to run a report to find all the Guest Child entries and move them into their own households at a later time.